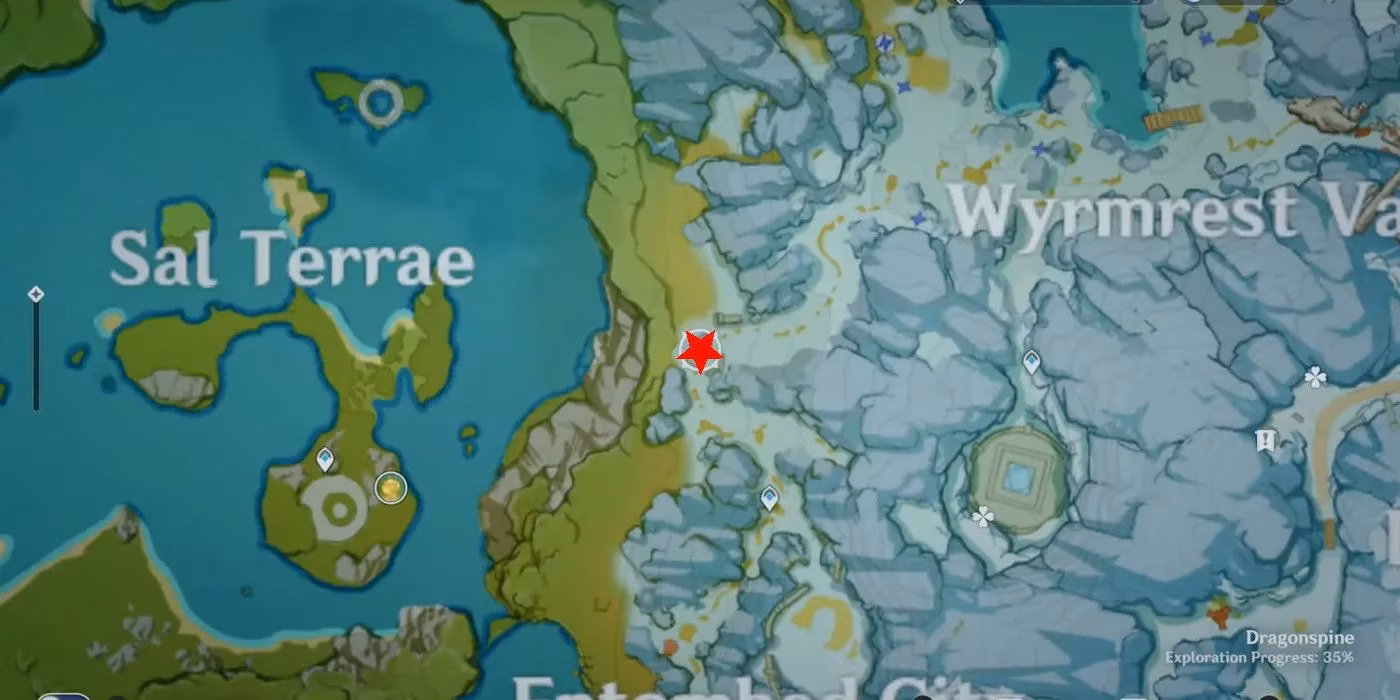
Hey fellow Travelers! As a seasoned explorer of Teyvat, I've braved countless challenges, but let me tell you, the Dragonspine pressure plate puzzle still holds a special place in my memory. It's one of those hidden gems you stumble upon while exploring the western edges of that frigid mountain, away from the main quests tied to the Frostbearing Tree. Isn't it amazing how Genshin Impact still surprises us with these clever, unmarked secrets years after its release? You're just wandering along the western cape, near the map's "Sal Terrae" text, and bam—there it is: a series of ancient plates set into the ground beside this mysterious stone wall. The sheer cold is already biting, enemies are lurking, and now you've got this brain teaser staring back at you. Talk about a multi-layered challenge!
Now, before we dive into the solution, let's talk preparation. Dragonspine is no joke, right? The Sheer Cold mechanic will sap your health if you're not careful. My number one tip? Always bring a Pyro character in your team. Not only do they help manage the cold, but they're also crucial for the initial setup of this puzzle. You see, one of the key pressure plates is completely encased in unbreakable ice when you first find it. Trying to solve the puzzle with it frozen is like trying to complete a circuit with a broken wire—it just won't work. Luckily, the developers were kind enough to place some Scarlet Quartz nearby. Smash that quartz, grab the warming essence, and use it to melt that special ice block. Once that's done, all eight pressure plates are ready for action.

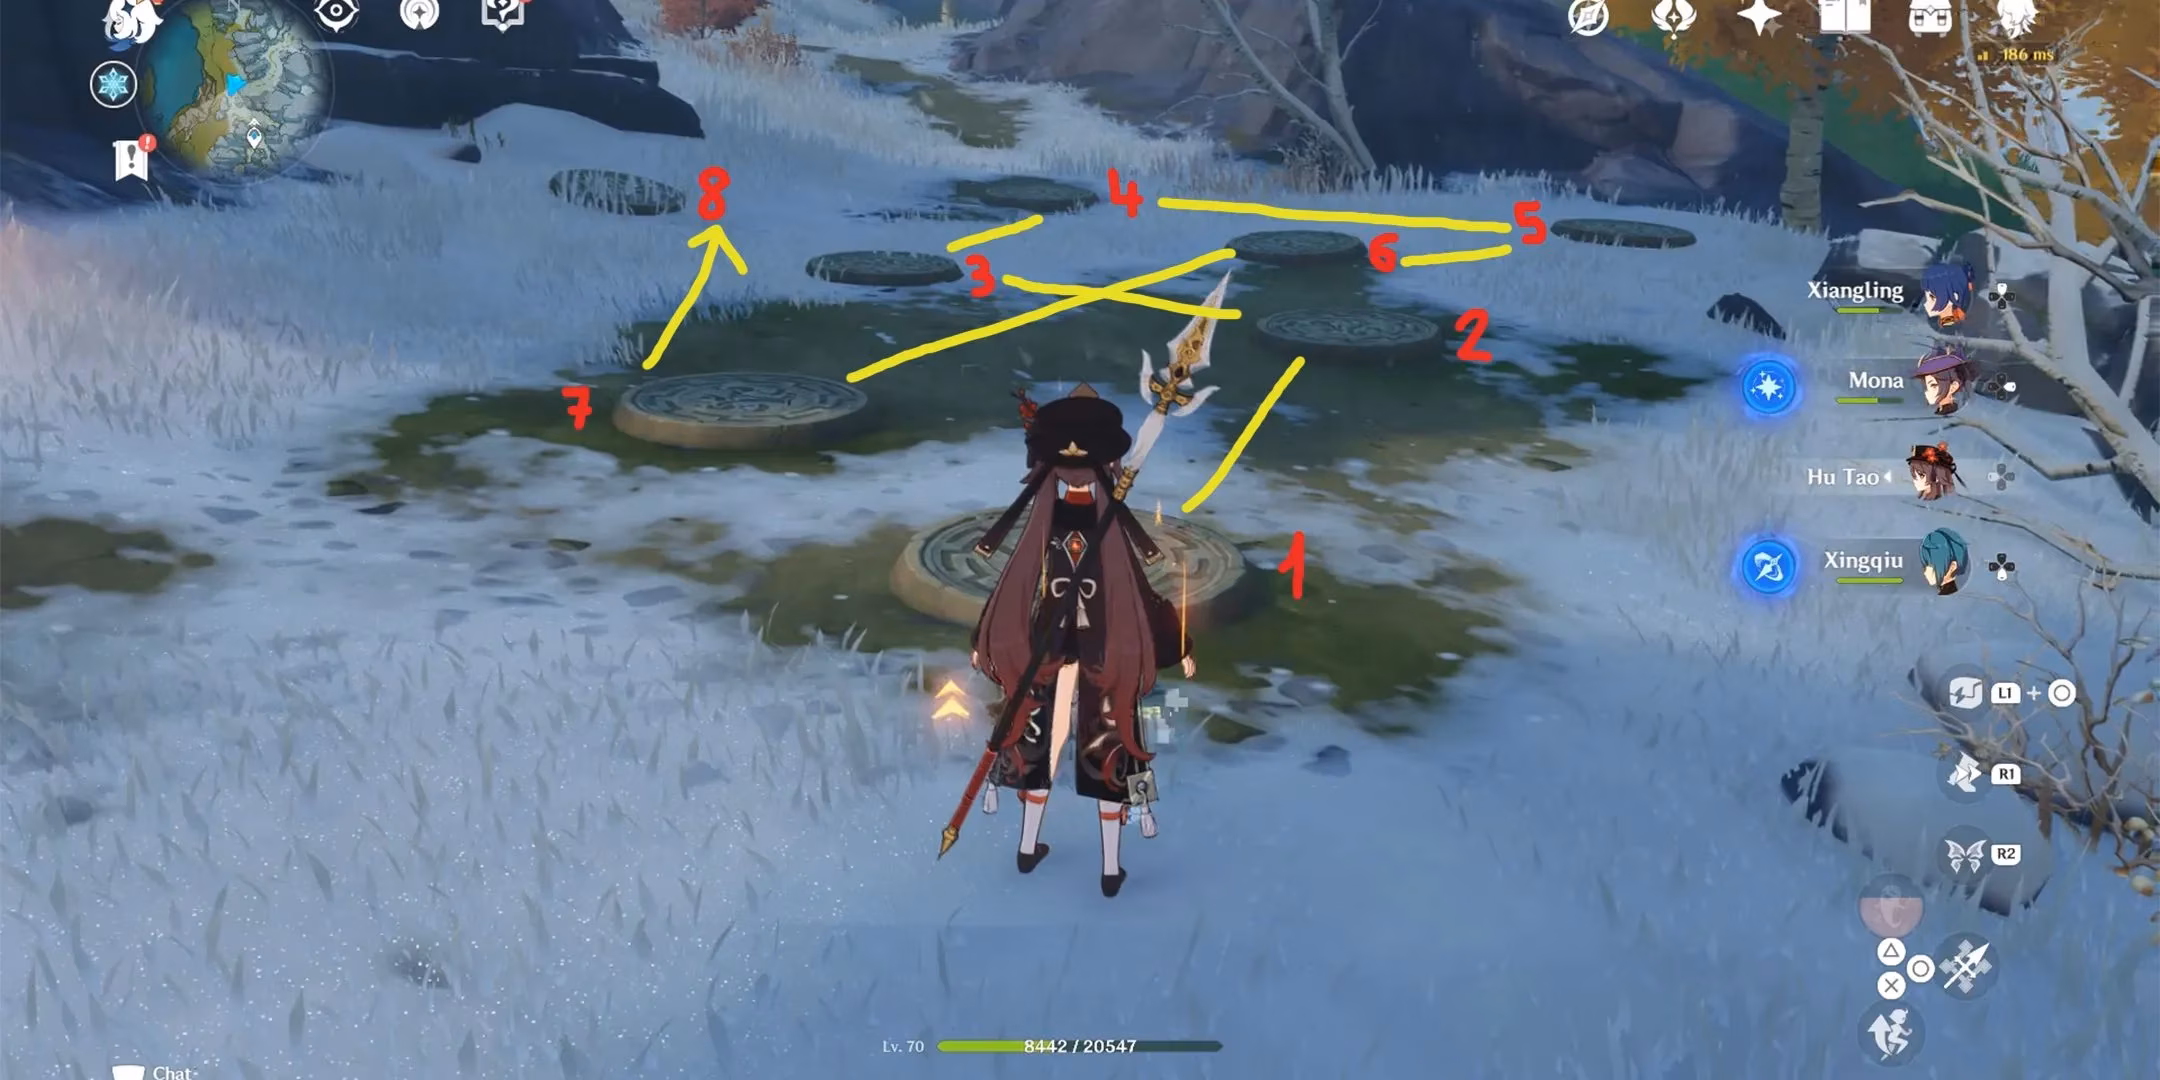
Okay, plates are thawed, team is ready... what's the trick? The core of the puzzle lies in the symbols. Take a close look at the stone wall. You'll see eight symbols etched into it, right? They belong to two distinct designs, and each design appears exactly four times. Now, look down at the plates at your feet. Each one corresponds to one of those symbols on the wall. When you step on a plate, its matching symbol on the wall lights up! This is your built-in guide. The goal is deceptively simple: you need to activate all four plates of one symbol type in a row, without interruption, before you touch any plate of the other type.
Here’s my step-by-step breakdown from my own successful run:
-
Choose Your Symbol: First, decide which of the two symbols you want to activate first. It doesn't matter which one you pick—the puzzle logic is symmetrical.
-
The Consecutive Rule: Find and step on the first plate of your chosen symbol. Wait for it to fully activate (you'll see it glow and the wall symbol light up) before moving to the next one.
-
Patience is Key: This is where many players mess up. The plates have a slight activation delay. Don't just tap-dance on them! Stand on one until it's clearly active, then move to the next plate with the same symbol.
-
Complete the Set: Repeat step 3 until all four plates bearing your initial symbol have been activated consecutively.
-
Finish the Sequence: Only after all four of the first symbol are lit should you step on any of the four plates for the second symbol. Once you step on one of the second type, the puzzle should complete.
Think of it like a password: A-A-A-A, then B. If you accidentally step on a 'B' plate before finishing all four 'A's, the sequence resets. No need to panic, though! Just start over from the beginning. I remember fumbling this a couple of times because I was too eager. So, take a deep breath of that freezing Dragonspine air and focus.

Alright, you've followed the steps, the puzzle is solved... what's in it for you? The reward is absolutely worth the brain freeze! Upon completion, you'll be greeted with two fantastic prizes:
🎁 A Luxurious Chest: This is the big one! Popping open this chest always feels great. It typically contains:
-
A decent amount of Mora (the universal currency).
-
Some enhancement ores for your weapons.
-
Other random adventure supplies.
🔴 A Crimson Agate: This is the real treasure for any Dragonspine explorer. Crimson Agates are used to level up the Frostbearing Tree, which in turn unlocks permanent buffs, blueprints, and other goodies for your entire account. Every single one counts!
To wrap it all up, here's a quick checklist for your adventure:
| Step | Action | Pro Tip |
|---|---|---|
| 1 | Locate the Puzzle | Head to the western cape of Dragonspine, east of "Sal Terrae" on the map. |
| 2 | Prepare Your Team | Include a Pyro character to handle Sheer Cold and melt ice. |
| 3 | Unlock the Plate | Use nearby Scarlet Quartz to melt the ice-encased pressure plate. |
| 4 | Understand the Rule | Activate all four plates of one symbol type in a row, then step on the other type. |
| 5 | Claim Your Reward | Open the Luxurious Chest and collect your Crimson Agate! |
So, what are you waiting for? Gear up, grab your warmest virtual coat, and head to Dragonspine. This puzzle is a perfect example of the thoughtful environmental storytelling and challenge that makes exploration in Genshin so rewarding. It's not about brute force; it's about observation and logic. Trust me, the satisfaction of hearing that chest unlock and seeing that Crimson Agate pop up is a feeling every Traveler should experience. Happy puzzling, and watch out for those Frostarm Lawachurls!
Comments